
800x800 sized papers
50 elements
5 papers
3 frames
you can purchase Garden Sunset at any of these stores
s.p.u
http://pimpinpsperswarehouse.com/index.php?main_page=index&manufacturers_id=10
p.f.d
Berry
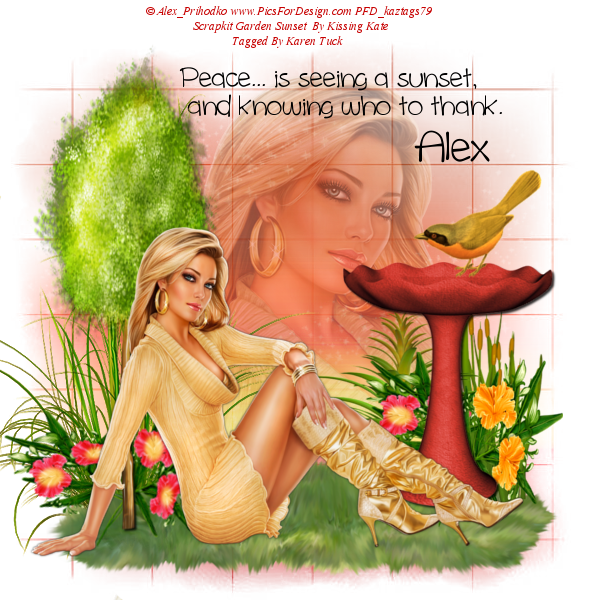
I am also using the awesome tube by © Alex_Prihodko www.PicsForDesign.com
and i am also using a mask by mistressv-signaturecollections

Basic Tutorial
This tutorial is of my own creation and any resemblance to any other tuts is purely coincidental. This tutorial is for personal use only.you will need a working knowledge of gimp or psp or other similar programmes.
I Am Using Gimp which is a free programme you can download.
Ok So Open Up Gimp .
Ok So Open Up Gimp .
* File > new > 600 x600 >ok
You should have a white canvas .
*now go to File > open as layers > go in to the scrapkit and choose a paper i am using paper 2 for this tutorial .
*now go to your tool box and select scale tool and scale the paper to fit the canvas .
*next we can add our mask .
*File > open as layers > select the mask you want to use i am using mask 78 .
*now go to your tool box and select scale tool and scale the mask to fit the canvas .
And make sure it is above the paper layer in your layers box
next right click the paper layer in the layer box and click add layer mask make sure full black transparency is
selected in the pop up box make sure the little black box is highlighted white on your dialogue box .
now click on your mask layer in the layer box and go up to edit then click copy .you can hide the mask layer now by clicking the little eye.
next click on your paper layer go up to edit and hit paste you should now see your mask paper layer you will need to anchor the floating layer you do this by hitting the little icon that looks like an anchor on your layer box.you can now delete the original mask layer .
*open element 14 scale to approx 500 x140 see my tag for placement now duplicate layer and stack behind the first one just slightly move it backwards creating a larger patch of grass.
*filters .....> light and shadow>.......dropshadow>.......2,2,2,> black
*open element 50 and scale see my tag for placement
*repeat drop shadow
*open element 50 and scale see my tag for placement
*repeat drop shadow
*open element 31 and scale see my tag for placement
*repeat drop shadow
*open element 31 and scale see my tag for placement
*repeat drop shadow
*open element 32 and scale see my tag for placement
*repeat drop shadow
*open element 1 and scale see my tag for placement
*duplicate element 1 and scale see my tag for placement
*dupliicate element 1 and scale see my tag for placement
*open element 2 and scale see my tag for placement
*duplicate element 2 and scale see my tag for placement
*duplicate element 2 and scale see my tag for placement
*duplicate element 2 and scale see my tag for placement
*open element 35 and scale see my tag for placement
*repeat drop shadow
*open element 34 and scale see my tag for placement
*repeat drop shadow
*open element 45 and scale see my tag for placement
*repeat drop shadow
*now open your tube and scale see my tag for placement and add a drop shadow
* add credits
*merge all layers
* add a quote or saying or your sig
and your done hope you enjoyed my basic easy to follow tutorial
heres some free snags for you


No comments:
Post a Comment